Jimmy Johns Bread Recipe: Unveiling the Secret to Unmatched Flavor
- Discover the secret to Jimmy Johns’ savory bread.
- Learn step-by-step how to recreate this recipe at home.
- Find out why this bread’s flavor is truly unmatched.
Have you ever wondered what makes the Jimmy Johns bread recipe so irresistibly delicious? Is it the crisp crust or the soft, fluffy interior that has you coming back for more? Whatever the magic is, you’re about to uncover the secrets behind that unmatched flavor.
Now, imagine recreating that same mouth-watering experience in your own kitchen. Yes, you! With a bit of guidance, your hands will craft the perfect loaf, leaving friends and family in awe. We’re talking about the kind of bread that becomes the talk of the table, the kind that makes any sandwich an instant classic.
But why settle for anything less than perfection? Much like the sought-after Cheesecake Factory’s brown bread, the Jimmy Johns bread recipe has its own cult following. And today, you’re in for a treat because we’re pulling back the curtain on this coveted formula.
Whether you’re a baking novice or a seasoned pro, this guide is tailored for all skill levels. Get ready to fill your home with the aroma of freshly baked bread that’s bound to stir up appetites and admiration. So, let’s roll up our sleeves and dive into the world of baking mastery!

Who Can Bake Jimmy John’s Bread
Are you ready to tackle the Jimmy Johns bread recipe? Whether you’re a newcomer to the world of baking or someone with a whisk that’s seen its fair share of flour, this recipe is approachable for all. Let’s assess the Jimmy Johns recipe difficulty level and get you set up for success.
Firstly, you don’t need a professional kitchen to start baking Jimmy Johns bread at home. However, you will need some essential tools:
- A sturdy mixing bowl for combining your ingredients.
- A reliable oven for achieving that perfect bake.
- A dough scraper to help shape your loaves.
- A baking sheet or stone to provide a solid baking surface.
Now, let’s talk time investment. You’ll need to set aside a few hours for this culinary adventure. This includes preparation, dough rising, and baking time. But rest assured, the end result is worth every minute spent.
Preparation Steps Overview
Embarking on the Jimmy Johns bread recipe journey starts with mixing your ingredients and allowing the dough to rise. This process is not just about following steps; it’s about infusing your dough with care and patience. After the initial rise, you’ll shape your dough into that iconic Jimmy John’s silhouette and let it rise once more before it hits the heat of the oven.
Are you concerned about the complexity? Fret not! The preparation steps are straightforward and designed to be foolproof. For an in-depth guide, you can visit Easy Homemade Life to get the full baking Jimmy Johns bread at home experience.
Remember, baking is both an art and a science. With the right approach, you’ll be slicing into a loaf of bread that rivals the freshness and flavor of Jimmy John’s itself.
Ingredients for the Authentic Jimmy John’s Bread
Now that we’ve discussed the minimal equipment needed to embark on our bread-making journey, it’s time to focus on the stars of the show—the ingredients. Selecting high-quality ingredients is the secret behind the delectable taste of Jimmy John’s French Bread Recipe. Let’s ensure we have everything on hand to recreate that iconic flavor in our own kitchens.
Assembling Your Bread-Making Staples
Before we dive into the mixing bowl, here’s what you’ll need:
- 4 cups of all-purpose flour – the foundation of our bread
- 1 tablespoon of granulated sugar – just a touch for the yeast
- 1 teaspoon of salt – to enhance the flavor
- 1 tablespoon of instant yeast – the leavening agent that makes the magic happen
- 1 ⅓ cups of warm water – to activate the yeast
- 2 tablespoons of vegetable oil – for a tender crumb
Quality matters when it comes to Jimmy Johns Bread Ingredients. Fresh, high-grade flour can make all the difference in texture and taste. And if you’re wondering about Jimmy John’s Bread Dairy Free Options, you’re in luck! This recipe is naturally dairy-free, making it a great choice for those with dietary restrictions.
Remember, the right proportions are crucial for that perfect loaf. If you need to swap out any ingredients due to allergies, such as using a gluten-free flour blend, adjustments may be needed in the water or oil to achieve the desired dough consistency.
Ready to mix these together and watch the dough rise to the occasion? Let’s get baking!

Step-by-Step Guide to Making Jimmy John’s Bread
Now that you’ve gathered all the necessary ingredients, are you ready to dive into the art of Making Jimmy John’s Bread? Let’s roll up our sleeves and turn those ingredients into a delicious loaf that rivals the original. Follow these steps closely, and soon you’ll be savoring your very own Jimmy Johns Bread Recipe Copycat creation!
- Mix the Dough: Begin by combining the yeast, sugar, and warm water in a large mixing bowl. Let it sit for about 5 minutes until the mixture becomes frothy. Add in the flour and salt, mixing until a shaggy dough forms. Are you feeling the excitement yet?
- Knead the Dough: Transfer the dough onto a floured surface and knead for about 8-10 minutes. You’re looking for a smooth, elastic texture. Think of it as a mini-workout before you indulge in the fruits of your labor!
- First Proof: Place the dough in a lightly oiled bowl, cover with a damp cloth, and let it rise. You’re aiming for it to double in size, which should take about an hour. Patience is key here, as this step is crucial for that perfect rise.
From Proofing to Golden Perfection
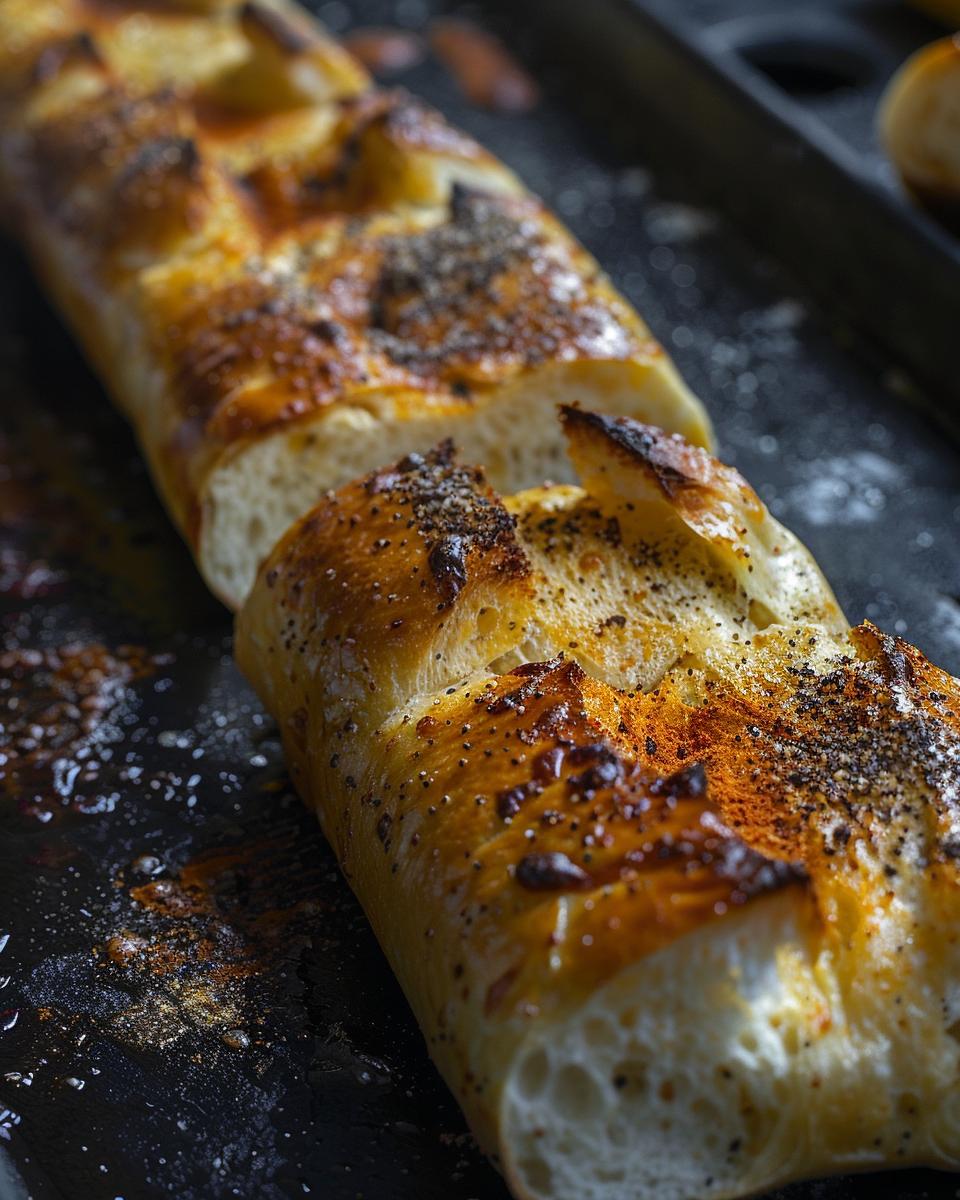
- Shape the Loaf: Once the dough has risen, gently punch it down and shape it into a log that resembles the iconic Jimmy John’s loaf. Are you starting to see the resemblance?
- Second Proof: Place the shaped dough onto a baking sheet, cover it again, and let it rise for another 30-45 minutes. This second proofing gives the bread its final size and ensures a light, airy interior.
- Bake: Preheat your oven to 350°F (175°C). When your loaf is ready, bake it for about 22-25 minutes. You’re looking for a beautiful golden crust and a hollow sound when tapped. That’s the signature of a perfectly baked Jimmy Johns Bread Recipe Bread Maker style loaf!
Now, wasn’t that a fulfilling experience? By following these steps, you’ve mastered the art of Making Jimmy John’s Bread. Slice it up, spread your favorite toppings, and take that first bite with pride. You’ve earned it!
Serving and Storage Tips for Jimmy John’s Bread
Now that you’ve mastered the art of making Jimmy John’s bread, let’s talk about the best ways to serve and store your freshly baked masterpiece. Whether you’re a novice baker or a seasoned pro, you’ll find these tips incredibly useful for enjoying your bread at its peak flavor and texture.
Jimmy John’s Bread Serving Ideas
First things first, how should you serve your Jimmy John’s bread? The answer is simple: however you like! Fresh out of the oven, the warm bread is irresistible. Slice it for sandwiches or serve alongside your favorite soups and salads. Have you tried toasting it for an extra crunch? It’s a game-changer! Remember, the key to a perfect serving is to slice it right before you’re ready to eat, preserving that signature softness inside the golden crust.
When it comes to Storing Jimmy John’s Bread, cool it completely before wrapping it up to maintain its texture. A paper bag is ideal for short-term storage as it allows the bread to breathe, keeping the crust crispy. If you need to store it for a couple of days, a plastic bag will help retain its moisture. Wondering about Freezing Jimmy John’s Bread? It’s a fantastic way to extend its shelf life. Just slice it before freezing, and you’ll have fresh bread ready to go whenever the craving strikes. Thaw it at room temperature or pop it in the oven for a few minutes for that just-baked taste.
So, are you ready to enjoy your homemade Jimmy John’s bread? With these serving and storage tips, you’ll be savoring every last bite. And remember, the best part of baking is sharing the love, so don’t hesitate to spread the joy with friends and family!

Pro Tips for Perfecting Your Jimmy Johns Bread Recipe
- Initially, use warm water to activate the yeast for the dough.
- Moreover, measure ingredients precisely for consistent results.
- Indeed, knead the dough until it’s smooth and elastic.
- Allow sufficient rise time for a light, airy loaf.
- Furthermore, preheat your oven for an even bake.
- Also, mist the oven with water to create a crisp crust.
- Bake until the bread sounds hollow when tapped.
- Lastly, cool on a wire rack to prevent sogginess.
FAQ: Variations and Cost-Effective Baking Tips
Embarking on your own Jimmy Johns Wheat Bread Recipe adventure or simply curious about the Jimmy Johns Bread Nutrition details? Look no further! We’ve compiled a list of frequently asked questions to help you bake the perfect loaf while keeping an eye on your wallet and dietary needs.
Common Questions on Bread-Making
Q1: Can I substitute ingredients in the Jimmy Johns Ingredient List to cater to dietary restrictions?
A1: Absolutely! For gluten-free needs, consider using a blend of rice flour and xanthan gum. Dairy-free? Swap out milk with almond or soy milk. Remember to adjust the yeast content accordingly to ensure proper rising.
Q2: What are some money-saving tips for baking Jimmy Johns Wheat Bread?
A2: Buying ingredients in bulk can significantly reduce costs. Also, consider making multiple loaves at once to save on energy bills. Homemade bread can be frozen for future use, ensuring you always have a fresh loaf on hand.
Q3: Is the nutritional content similar when making substitutions in the recipe?
A3: Substitutions can alter the Jimmy Johns Bread Nutrition profile, so it’s important to use similar ingredient types. For instance, swapping white flour for whole wheat will increase fiber content but maintain similar calorie levels.
Q4: How can I ensure my bread has the same texture as Jimmy Johns?
A4: The key is in the kneading and proofing. Follow the recipe’s time guidelines and create a moist dough environment. For more detailed guidance, check out this tutorial.
Q5: Are there any tricks to replicate the Jimmy Johns bread taste at home?
A5: Yes! Use high-quality ingredients and don’t rush the fermentation process. This allows the flavors to develop fully, getting you closer to that signature Jimmy Johns taste.


