Dairy Free Ice Cream Recipe: Mind-Blowing and Delicious
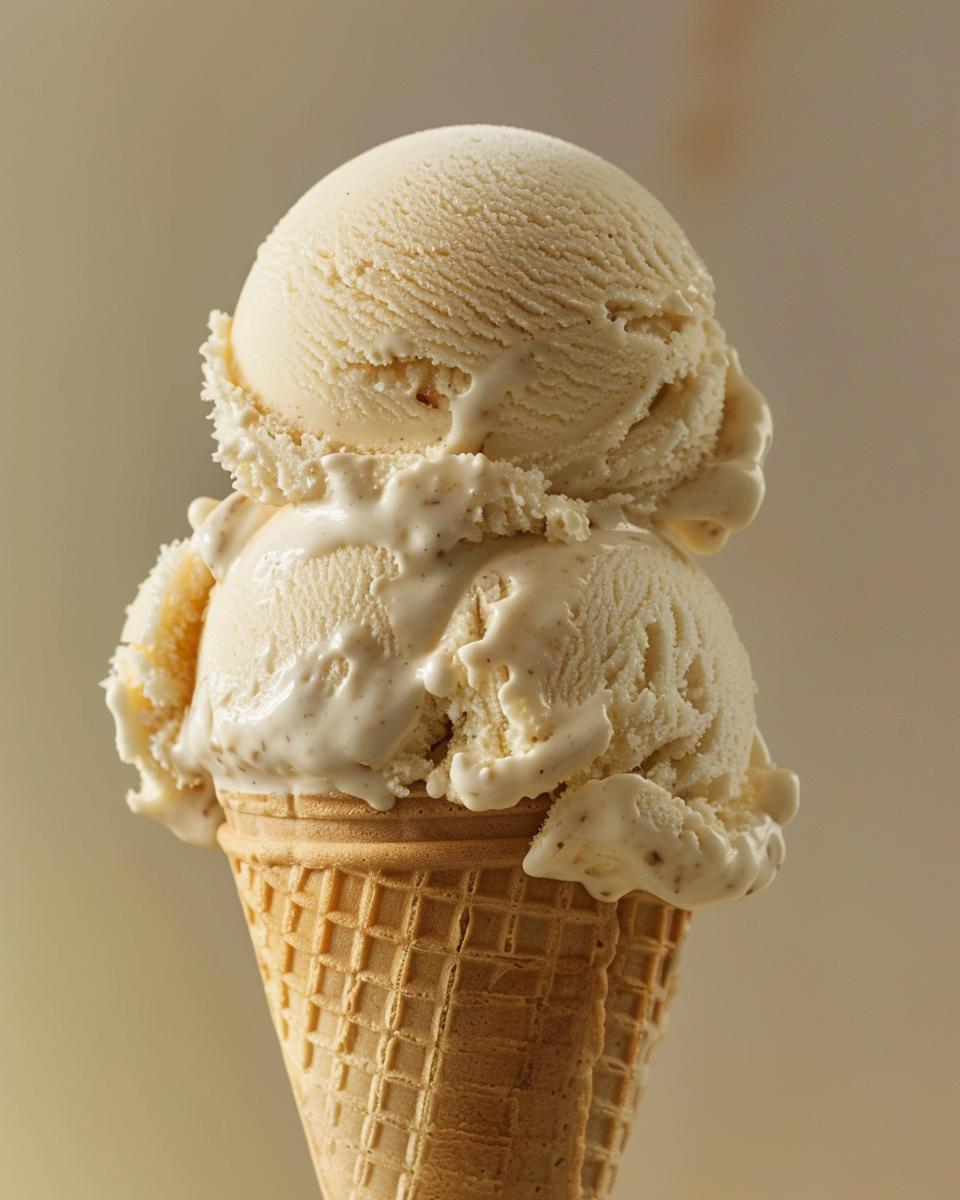
Are you ready to indulge in a dairy free ice cream recipe that will blow your mind? This delicious treat is perfect for those who are lactose-intolerant or simply seeking a healthier alternative. Packed with flavor and creamy goodness, this dairy-free delight is a must-try for any ice cream lover.
In this recipe:
- Easy-to-follow steps
- Only a few simple ingredients
- Tips for perfect texture and flavor
- Customizable with your favorite add-ins
Imagine enjoying a scoop of ice cream that is both creamy and free from dairy. This recipe uses almond milk and coconut cream, ensuring a rich and satisfying texture. If you love experimenting with new flavors, check out our 3 ingredient ice cream recipes for more inspiration. Whether you’re making this for yourself or sharing with friends, everyone will be asking for seconds.
Have you ever wondered how to recreate your favorite fast-food ice cream at home? You might want to try our Chick Fil A Ice Cream Recipe for another fun and tasty adventure. With this dairy-free ice cream recipe, you’ll have a versatile base that can be customized with nuts, chocolate chips, or any other toppings you enjoy.
Get ready to impress your taste buds and those of your loved ones. Dive into this dairy-free ice cream recipe and discover the joy of making your own delicious dessert at home. Happy churning!
Who Can Make This Recipe
Anyone with basic kitchen skills can enjoy making homemade vegan ice cream without a machine. Designed to be easy and accessible, this recipe is perfect for beginners and intermediate cooks alike. Whether you’re just starting out or have some experience, you’ll find this process straightforward and rewarding.
Difficulty Level: Easy to Medium
This recipe falls into the easy to medium difficulty range. If you can whisk, blend, and measure ingredients, you’re all set. You don’t need to be a professional chef; just follow the steps carefully, and you’ll create a delightful dairy-free treat.
Essential equipment includes a medium saucepan, a whisk, and a blender. While an ice cream maker is optional, it can simplify the process. A freezer-safe container is also necessary to store your ice cream until it reaches the perfect consistency.
If you’re looking for more easy vegan ice cream ideas, check out these simple non-dairy ice cream tricks. They offer additional flavors and techniques to expand your ice cream-making repertoire.
For those without an ice cream maker, don’t worry. You can still achieve creamy results. Just pour the mixture into a container, freeze, and stir every 30 minutes until firm. This simple non-dairy ice cream trick ensures a smooth texture.
Enjoy making this vegan ice cream and feel free to experiment with your favorite add-ins. Whether you add nuts, chocolate chips, or fruit, the possibilities are endless. Happy churning!
The Ingredients Needed to Make Dairy-Free Ice Cream
Now that we’ve established the minimal equipment needed, let’s talk about the ingredients. Selecting the right components is crucial for achieving the perfect texture and flavor in your dairy-free ice cream. This recipe is designed to be simple yet delicious, making it accessible for all levels of home cooks. Ready to get started? Let’s dive into what you’ll need.
Essential Ingredients for Success
1 cup almond milk: Choose unsweetened and unflavored for the best results. Almond milk provides a light and nutty base that complements the richness of coconut cream.
1 cup coconut cream: This is what gives your ice cream a creamy texture, typically provided by dairy. Make sure to use full-fat coconut cream for the best consistency.
1/2 cup granulated sugar: The sweetness balance is key. You can substitute this with other sweeteners like maple syrup or agave for a different flavor profile.
1/4 cup cornstarch: A thickening agent that helps achieve the perfect creamy texture without using eggs, making this a truly vegan vanilla ice cream without eggs.
1/4 cup water: Helps to dissolve the cornstarch smoothly into the mixture.
1 teaspoon vanilla extract: Vanilla adds that classic, irresistible flavor. Opt for a high-quality extract for the best dairy-free ice cream suggestions.
1/2 teaspoon salt: A pinch of salt enhances all the other flavors, making your ice cream taste even more delightful.
Optional add-ins: Feel free to add chopped nuts, chocolate chips, or fruit pieces to create your favorite variations of plant-based vanilla ice cream recipes.
By carefully choosing these ingredients, you’ll ensure that your dairy-free and sugar-free ice cream options turn out perfectly every time. So, gather your ingredients and let’s make some delicious, vegan-friendly ice cream!
Step-by-Step Guide on How to Make Dairy-Free Ice Cream
Now that we have gathered all our ingredients, let’s dive into the fun part—making the ice cream! Follow these simple steps to create a delicious, creamy treat without any dairy.
Preparation Steps
Step 1: In a medium saucepan, whisk together the almond milk, coconut cream, sugar, cornstarch, and water until the mixture is smooth. This is the base for your no-churn vegan ice cream method.
Step 2: Place the saucepan over medium heat. Whisk the mixture constantly until it comes to a boil. This will ensure that the cornstarch activates and thickens the mixture. Once boiling, reduce the heat to low and let it simmer for 2 minutes. Keep whisking occasionally to prevent any lumps from forming.
Step 3: Remove the saucepan from the heat. Stir in the vanilla extract and salt. These add depth and enhance the flavors of your creamy soy-based ice cream recipe. Your mixture should now be smooth and slightly thickened.
Once these steps are complete, you’ve successfully created the base for your dairy-free ice cream. Next, we’ll move on to chilling and churning to achieve that perfect, creamy texture.
For those interested in making ice cream with lactose-free milk, these steps are quite similar. You can substitute almond milk with lactose-free milk if you prefer. And if you’re exploring methods for making coconut ice cream without a machine, you’ll find this recipe easily adaptable with simple tweaks.
Important Tip: Ensure that all ingredients are fresh and high-quality for the best results. Consistent whisking is key to a smooth, lump-free mixture.
Stay tuned for the next part where we’ll cover the chilling and churning process to make your ice cream ready to enjoy!
Serving and Storing Ideas and Tips
Now that you’ve mastered the step-by-step guide on how to make this delightful dairy-free ice cream, let’s dive into some serving and storing ideas and tips. Whether you’re a kitchen newbie or a seasoned chef, you’ll find these tips both helpful and easy to follow.
Serving Dairy-Free Ice Cream
When it comes to serving dairy-free ice cream, the possibilities are endless. Enjoy it plain or spice it up with some dairy-free frozen dessert toppings. Fresh fruits like strawberries or blueberries, a drizzle of maple syrup, or even a sprinkle of nuts can elevate your ice cream to a new level. Why not try combining it with other best homemade non-dairy frozen treats like sorbet or a fruit smoothie for a refreshing twist?
For a more decadent experience, consider topping your ice cream with dairy-free chocolate chips, caramel sauce, or even crumbled cookies. The goal is to make each scoop a delightful experience for your taste buds.
Hosting a party? Create an ice cream bar with various toppings and let your guests customize their bowls. It’s a fun and interactive way to enjoy your homemade creation.
Storing Homemade Ice Cream
Properly storing homemade ice cream is key to maintaining its creamy texture and flavor. Transfer your churned ice cream to a freezer-safe container with a tight-fitting lid. This helps prevent ice crystals from forming and keeps your ice cream fresh.
Before sealing the container, press a piece of parchment paper directly onto the surface of the ice cream. This extra step minimizes air exposure and helps maintain the smooth, creamy consistency. Store your ice cream in the coldest part of your freezer, usually the back, to keep it at a consistent temperature.
Ready to enjoy? Let your ice cream sit at room temperature for 10-15 minutes before scooping. This softens it slightly, making it easier to serve and enhancing the flavors. Remember, homemade ice cream is best enjoyed within two weeks for optimal taste and texture, though we doubt it will last that long!
With these serving and storing ideas and tips, you’re all set to enjoy your delicious, dairy-free ice cream to the fullest. Happy scooping!
Pro Tip
- Use high-quality almond milk and coconut cream for a richer taste.
- For a smoother texture, blend the mixture twice before freezing.
- Adding a pinch of salt enhances the overall flavor profile.
- Experiment with natural sweeteners like maple syrup or agave nectar.
- To avoid ice crystals, cover the container with plastic wrap.
- Freeze the mixing bowl for 15 minutes before churning.
- Always let your ice cream sit for 10 minutes before scooping.
- For extra creaminess, add a tablespoon of coconut oil.
- Use a silicone spatula for easy transfer of the mixture.
- Get creative with mix-ins like dried fruit or vegan cookie dough.
FAQ
Welcome to our FAQ section! Here, we address some of the most common questions about making non-dairy ice cream. Whether you’re new to this culinary adventure or a seasoned pro, we hope you’ll find these answers helpful.
Non-Dairy Ice Cream Recipes Without Sugar
Can I use a different type of non-dairy milk?
Yes, you can! If you prefer not to use almond milk, soy milk or oat milk are excellent alternatives. Each type of milk gives a slightly different texture and flavor, so feel free to experiment to find your favorite.
How can I save money on ingredients?
Saving money on ingredients is easy if you know where to look. Consider buying ingredients in bulk or opting for store brands. You can often find good deals on non-dairy milks and coconut cream at wholesale stores or online marketplaces.
What if I don’t have an ice cream maker?
No ice cream maker? No problem! Simply blend your mixture well and freeze it in a shallow container. Stir the mixture every 30 minutes until it becomes firm. This method ensures a smooth and creamy texture without the need for special equipment.
Sugar-Free Coconut Milk Ice Cream Techniques
Can I make sugar-free coconut milk ice cream?
Absolutely! To make sugar-free coconut milk ice cream, you can use natural sweeteners like stevia or erythritol. These alternatives are perfect for maintaining sweetness while keeping your ice cream sugar-free.
Can I add flavors to my sugar-free ice cream?
Yes, adding flavors is a great way to customize your ice cream. Vanilla extract, cocoa powder, and even fresh fruit can enhance the taste. Just make sure any added ingredients are also sugar-free to keep your dessert healthy.
For more tips on creating delicious non-dairy ice cream, check out this 3-ingredient no-churn vanilla ice cream recipe from The Roasted Root.

