Amish Friendship Bread Starter Recipe: Unlock the Secrets to Perfect Results
Are you ready to embark on a baking adventure that brings a touch of tradition to your kitchen? Our Amish friendship bread starter recipe is your gateway to delicious, homemade bread that’s rich in flavor and history. With a few simple ingredients and a bit of patience, you’ll create a starter that can be shared with friends and family, spreading joy and warmth one loaf at a time.
In this recipe:
- Ingredients for the perfect starter
- Step-by-step instructions
- Tips to keep your starter thriving
- Storage and usage guidelines
Ever wondered how to make your bread truly stand out? This recipe holds the key! If you enjoy the art of baking, you might also explore our Kitchenaid Bread Recipe for more homemade bread goodness. Additionally, our Sourdough Starter Recipe could transform your baking forever.
Ready to get started? Let’s dive into the world of Amish friendship bread and unlock its secret tips. Embrace the process, share the love, and enjoy the delightful results of your labor.

Who Can Make This Recipe?
This Amish friendship bread starter recipe is perfect for anyone looking to dive into the world of homemade bread. Whether you’re a seasoned baker or just starting out, this recipe is tailored for all skill levels. In fact, it’s one of the best easy starter recipes for beginners. The simplicity and flexibility make it a favorite among home bakers who enjoy creating and sharing their culinary masterpieces.
What You Need to Get Started
Before you begin making Amish bread from scratch, you’ll need a few essential tools and ingredients. Here’s a quick list to help you gather everything you need:
- Mixing bowls
- Measuring cups and spoons
- A whisk or spoon for stirring
- Plastic wrap or a damp cloth to cover the starter
These basic tools are likely already in your kitchen, making it even easier to get started on this delightful baking journey.
One of the best aspects of this recipe is its scalability. Whether you’re baking for a small family or preparing to share with friends, our starter recipe scalability guide has you covered. You can easily adjust the quantities to fit your needs, ensuring that you always have enough to go around.
For those looking to expand their baking repertoire, check out this Amish Friendship Bread Starter Recipe for more inspiration. This guide will provide additional tips and tricks to perfect your starter.
So, why wait? Gather your ingredients and tools, and let’s embark on this rewarding baking adventure together. Embrace the tradition of Amish friendship bread and enjoy the process of creating something truly special.
The Ingredients Needed to Make Amish Friendship Bread Starter
Now that we’ve covered the minimal equipment required, let’s dive into the essentials – the ingredients. Choosing the right ingredients is crucial for perfecting your Amish Friendship Bread Starter. With just a few simple items, you can create a starter that’s both delicious and versatile. Ready to get started?
Gathering Your Ingredients
Here’s what you’ll need:
- 1 cup warm water (105°F to 115°F)
- 1 cup all-purpose flour
- 1/2 teaspoon active dry yeast
- 1/2 cup sugar
- 1/2 cup milk
- 1/2 cup flour (for dusting the starter)
Each ingredient plays a vital role in ensuring your starter develops the right texture and flavor. The yeast is the powerhouse, driving the fermentation process. Warm water activates the yeast, while sugar serves as its food, promoting growth and activity. Flour provides structure, and milk contributes to the starter’s richness and tang.
Do you have dietary restrictions? No problem! For those needing ingredient substitutions, you can opt for gluten-free flour without compromising the outcome. Simply follow gluten-free Amish bread instructions by using the same measurements. If you prefer a dairy-free option, substitute milk with almond or soy milk.
Remember, the quality of your ingredients impacts the final product. Always choose fresh, high-quality items to ensure the best results. Now that you have your ingredients ready, you’re one step closer to making your own delicious Amish Friendship Bread Starter!

Step-by-Step Guide on How to Make Amish Friendship Bread Starter
Now that you have your ingredients ready, let’s dive into the detailed recipe steps. This 10-day process of Amish bread starter creation might seem daunting, but with this step-by-step guide, you’ll find it easy and enjoyable. Let’s get started on this delightful journey!
Day 1: Mixing the Ingredients
On the first day, combine 1 cup warm water (105°F to 115°F), 1 cup all-purpose flour, and 1/2 teaspoon active dry yeast in a large bowl. Stir well until the mixture is smooth. Cover the bowl with plastic wrap or a damp cloth and leave it at room temperature.
Tip: Ensure the water is warm but not hot. This helps the yeast activate properly.
Day 2-4: Stirring the Mixture
For the next three days, simply stir the mixture once a day. This ensures that the starter stays active and well-mixed. You may notice bubbles forming – this is a good sign that fermentation is happening.
Day 5: Feeding the Starter
On Day 5, add 1/2 cup sugar, 1/2 cup milk, and 1/2 cup all-purpose flour to the starter. Stir well to combine. Cover again and let it sit at room temperature.
Day 6-9: Stirring the Mixture
For the next four days, stir the mixture once a day. By now, the starter should be bubbly and have a slightly tangy aroma. This indicates that the fermentation process is progressing well.
Day 10: Final Feeding and Ready to Use
On Day 10, add another 1/2 cup sugar, 1/2 cup milk, and 1/2 cup all-purpose flour to the starter. Stir well. Your Amish Friendship Bread starter is now ready to use!
Tip: Remove the amount you need for your recipe and discard the rest, or share it with friends.
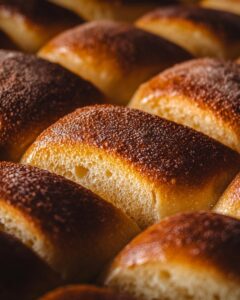
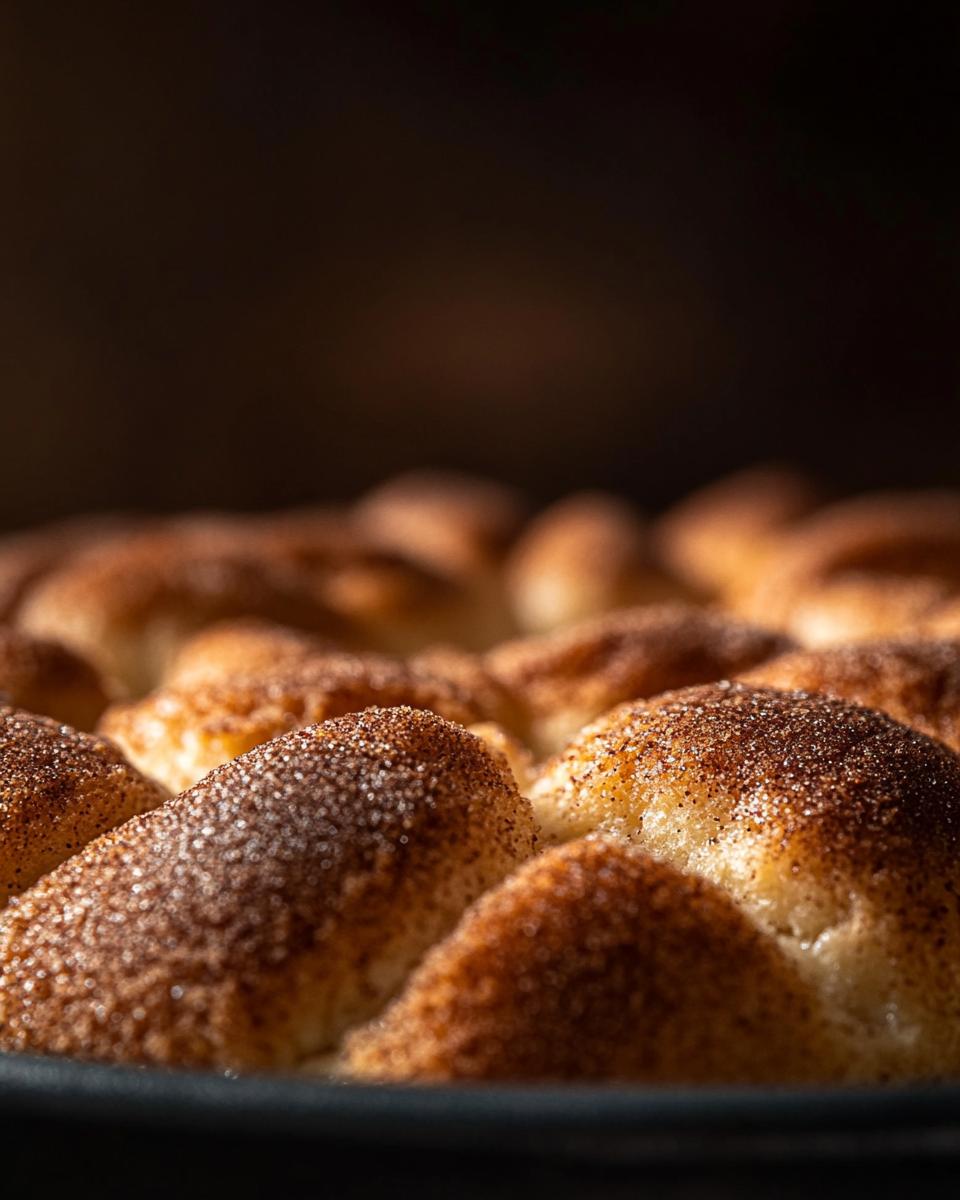
Check out our photos and videos section to see each step clearly illustrated.
Starter Troubleshooting FAQs: Having issues? Check out our starter troubleshooting FAQs for common problems and solutions.
Congratulations! You’ve successfully created your own Amish Friendship Bread starter. Enjoy baking and sharing this delightful bread with friends and family!
Serving and Storing Ideas and Tips
Now that you’ve mastered the step-by-step guide on how to create your Amish Friendship Bread starter, let’s dive into the specifics of serving and storing. This section ensures that your delicious creation remains fresh and ready to use, no matter your cooking experience level.
Day-by-Day Instructions for Maintaining Your Starter
To maintain your starter over 10 days, follow these simple steps:
- Day 1: Receive your starter or create it from scratch.
- Day 2-4: Stir the mixture daily.
- Day 5: Feed the starter with 1 cup each of flour, sugar, and milk. Stir well.
- Day 6-9: Stir the mixture daily.
- Day 10: Feed the starter again with 1 cup each of flour, sugar, and milk. Stir well.
After Day 10, your starter is ready to use for baking. Be sure to save a portion to maintain or share with friends!
Wondering how to store Amish starter? You can keep it in the refrigerator for up to two weeks. If you need a longer break, consider freezing Amish starter for later use. Simply freeze it in a sealed container for up to three months. Thaw it in the fridge before using.
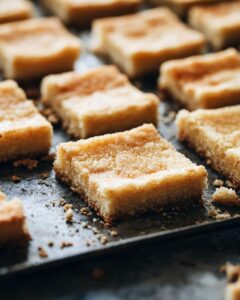
Thinking about starter uses beyond bread? Get creative! This versatile starter can be used for pancakes, waffles, muffins, and even cake. The possibilities are endless.
Here are some tips to troubleshoot common issues:
- If your starter isn’t bubbling, check the temperature of your kitchen. It should be warm, but not too hot.
- If you notice a strange smell, your starter might need a feeding. Give it some flour, sugar, and milk, then stir.
- If mold appears, discard the starter and start fresh. Cleanliness is key!
Adding photos or videos for each step can make the process even clearer. Visual aids help you see exactly how the starter should look at each stage.
Maintaining your starter is a rewarding and straightforward process. With these tips, you’ll enjoy creating delicious baked goods for weeks and months to come. Happy baking!

Pro Tips for Making Amish Friendship Bread Starter Recipe
- Always use warm water to activate the yeast effectively.
- Stir the starter daily to prevent a crust from forming.
- Feed the starter with sugar and milk every 3-5 days.
- Store the starter in a non-metallic bowl for best results.
- Label your starter with the date to track feeding times.
- Use a digital thermometer to ensure water temperature is correct.
- If the starter seems inactive, add a pinch of yeast.
- For a gluten-free version, use gluten-free flour alternatives.
- Share extra starter with friends to spread the joy of baking.
- Store unused starter in the fridge to slow fermentation.
- Freeze the starter in portions for up to 3 months.
FAQ – Ingredient Replacement Options, Money Savings Options, Relevant Tips
In this section, we’ll address some common questions about ingredient replacements, cost-saving tips, and other relevant tips for making and maintaining your Amish Friendship Bread starter. Let’s dive into the details!
Ingredient Replacement Options
Q1: Can I use almond milk instead of regular milk in the starter?
A: Yes, you can replace regular milk with almond milk. The texture and flavor might be slightly different, but it will still work. Just make sure it’s unsweetened to avoid altering the sweetness of the starter too much.
Q2: What can I use instead of all-purpose flour?
A: You can substitute all-purpose flour with whole wheat flour for a healthier option. Keep in mind that whole wheat flour will make the starter denser and give it a nuttier flavor.
Q3: Is there an alternative to sugar for feeding the starter?
A: You can use honey or maple syrup as a natural sweetener. Note that these can slightly change the flavor and texture of the starter, but they will still ferment properly.
Money Savings Options
Q1: How can I save money on ingredients for the starter?
A: Buy ingredients in bulk. Flour and sugar, in particular, are cheaper when purchased in larger quantities. Also, look for sales or discounts on yeast and milk.
Q2: Can I reuse the starter instead of discarding a portion?
A: Yes, you can reuse the starter by sharing it with friends or using it in multiple recipes. This way, you reduce waste and make the most of your ingredients.
Relevant Tips
Q1: How do I know if my starter is fermenting properly?
A: Look for bubbles and a tangy aroma. These are signs that the yeast is active. If the starter is not fermenting, try adding a small amount of yeast to jumpstart the process.
Q2: What should I do if my starter develops a crust?
A: Stir the starter regularly to prevent a crust from forming. If a crust does form, simply remove it and stir the starter well before using it.
For more detailed information on maintaining your starter, check out this guide.
By following these tips and answers, you’ll be well on your way to perfecting your Amish Friendship Bread starter while saving money and ensuring the best results!