Pear Preserves Recipe: Transform Your Breakfast with This Secret
Have you ever wondered how to elevate your breakfast? Look no further! This pear preserves recipe will transform your morning meal into something extraordinary. With just a few simple ingredients, you can create a delightful spread that pairs perfectly with toast, pancakes, or even yogurt.
In this recipe:
- 4 pounds ripe pears
- 2 cups granulated sugar
- 1 cup water
- 1/4 cup lemon juice
- 1/4 cup vanilla extract
- 1/2 teaspoon salt
- 1/4 teaspoon ground cinnamon
- 1/4 teaspoon ground nutmeg
Imagine waking up to the aroma of freshly made pear preserves. It’s a simple yet effective way to make your breakfasts special. Unlike store-bought spreads, homemade preserves have a unique, rich flavor that you can customize. If you enjoyed our Apple Jam Recipe, you’ll love this one too!
Creating your own preserves is not just rewarding but also allows you to control the ingredients. No preservatives, just pure, natural goodness. Additionally, if you’re a fan of jellies, our Muscadine Jelly Recipe might be another great choice for you.
Ready to get started? Follow our step-by-step guide to make the best pear preserves you’ve ever tasted. Your breakfasts will never be the same again!

Who Can Make This Recipe and What You Need
This recipe for homemade pear preserves is suitable for everyone, whether you’re a beginner or an experienced cook. The difficulty level is easy, making it accessible even for those new to canning. What you need is a few essential kitchen tools and some basic ingredients. Let’s dive into what you’ll need to get started.
Essential Kitchen Tools
To make these easy pear preserves with no pectin, you’ll need the following tools:
- Large saucepan
- Measuring cups and spoons
- Sterilized jars
- Canning tools (jar lifter, funnel, etc.)
Having these tools on hand will make the process smoother and more enjoyable. If you’re new to canning, don’t worry—it’s simpler than it seems. For a detailed guide on canning basics, you can check out this Canning 101 article from Taste of Home.
One of the best parts about this quick pear preserves recipe for canning is its simplicity. You don’t need any advanced skills or special equipment to achieve delicious results. Just follow the steps, and you’ll have the best recipe for pear preserves ready in no time. Whether you’re making these preserves for your family or as a gift, they’ll surely impress.
So, gather your tools and ingredients, and let’s get started on making some delightful pear preserves. With this easy recipe, you’ll be able to enjoy the sweet, rich flavor of homemade pear preserves any time of the year!
Ingredients Needed to Make Pear Preserves
Now that we’ve covered the minimal equipment needed for this simple yet delightful recipe, let’s dive into the heart of the matter: the ingredients. Choosing the right ingredients is crucial for achieving the perfect batch of spiced pear preserves. Let’s take a closer look at what you’ll need to get started.
Essential Ingredients
To make these delicious pear preserves with lemon, you’ll need the following ingredients:
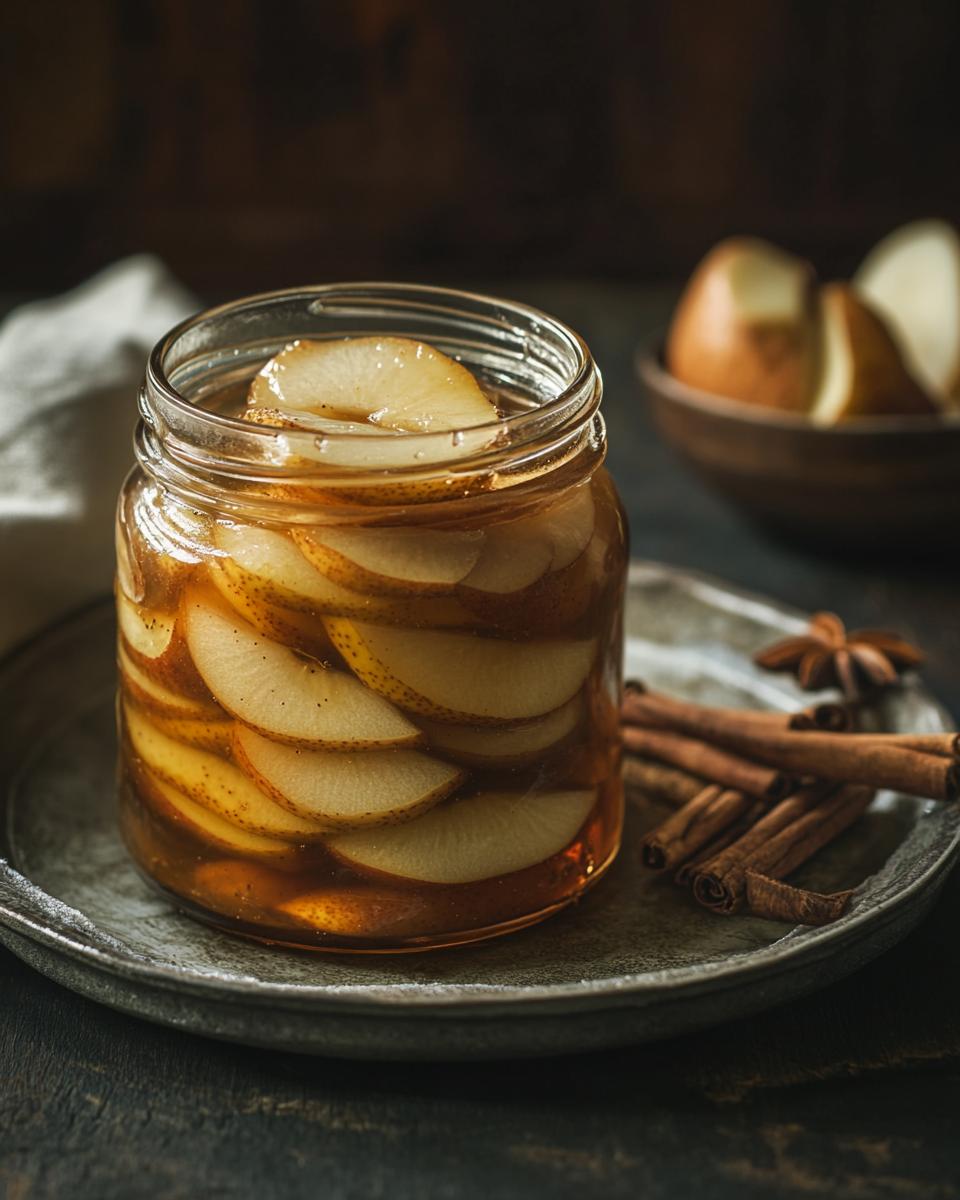
- 4 pounds ripe pears, peeled, cored, and sliced. Be sure to select pears that are ripe yet firm for optimal texture.
- 2 cups granulated sugar. This will help balance the natural sweetness of the pears.
- 1 cup water. This will aid in dissolving the sugar and creating a smooth consistency.
Have you ever tried making low sugar pear preserves? If you’re interested in a healthier option, you can adjust the sugar amount based on your preferences. Adding a touch of ginger can also elevate the flavors, creating delightful ginger pear preserves.
Remember, the key to perfect preserves lies in the quality of the ingredients. So, gather your pears and let’s get preserving!

Step-by-Step Guide on How to Make Pear Preserves
Now that we have our ingredients ready, let’s dive into the process of making the best homemade pear preserves. Follow these simple steps to create your own easy pear preserves for beginners and enjoy the delightful flavors of homemade pear preserves with no pectin.
Combining the Ingredients
First, gather your prepared pears and other ingredients. In a large saucepan, combine the sliced pears, sugar, water, lemon juice, vanilla extract, salt, cinnamon, and nutmeg. Stir well to ensure all the ingredients are evenly mixed.
Next, bring the mixture to a boil over medium-high heat, stirring occasionally. This helps to dissolve the sugar and blend the flavors. Don’t forget to keep an eye on it to prevent sticking or burning.
Once the mixture reaches a boil, reduce the heat to low. Let it simmer uncovered for 30-40 minutes. During this time, the pears will become tender, and the mixture will thicken, creating that delicious preserve texture we all love.
As the mixture simmers, use a spoon to mash the pears slightly. This step adds a wonderful texture to your preserves, with chunks of pear in every bite. Continue to simmer for an additional 10-15 minutes if needed, until you achieve your desired consistency.
After the preserves have thickened to your liking, remove the saucepan from the heat. Allow the mixture to cool slightly before transferring it to sterilized jars. Make sure to leave about 1/4 inch of headspace in each jar.
Wipe the rims of the jars with a clean cloth to ensure a good seal, then apply the lids and rings. For those interested in canning pear preserves, process the jars in a boiling water bath for 10 minutes.
And there you have it! Your easy pear preserves for beginners are ready to enjoy. Whether you’re spreading them on toast or using them as a topping, these preserves are sure to delight. Happy preserving!
Serving and Storing Ideas and Tips
After successfully making your delicious pear preserves, the next step is to enjoy them! Whether you’re a beginner or an experienced cook, serving and storing these preserves is straightforward and rewarding. Let’s dive into some practical tips and ideas.
Serving Suggestions
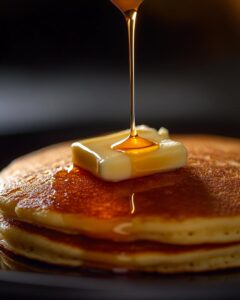
Serve your homemade fruit preserves with pears on a variety of dishes to enhance their natural sweetness. They pair wonderfully with toast, pancakes, waffles, or as a topping for ice cream and yogurt. You can also use them in baking, adding a delightful pear flavor to pastries and cakes. Have you ever tried pear preserves on a cheese platter? It’s a match made in heaven!
Experiment with different pairings to find your favorite combination. The versatility of these preserves means you can get creative and discover new ways to enjoy them.
Storing Tips
Proper storage is key to maintaining the freshness and flavor of your pear preserves. Here are some tips:
- For short-term storage, keep the preserves in the refrigerator. They will last up to two weeks.
- To extend their shelf life, you can freeze them. Freezer pear preserves can last for up to six months. Ensure you use airtight containers to prevent freezer burn.
- If you prefer long-term storage, consider canning. Canned pear preserves can be stored in a cool, dark place for up to a year. This method is perfect for preserving the seasonal flavor of pears.
When storing your preserves, always label the jars with the date of preparation. This helps you keep track of freshness and ensures you enjoy the best flavor.
Remember, the best pears for preserves are ripe but firm. This ensures they hold their shape and provide the best texture in your preserves. With these serving and storing tips, you’ll get the most out of your delicious pear preserves.
Enjoy your culinary creation and feel proud of your homemade preserves. Happy preserving!

Pro Tips for Perfect Pear Preserves
- Choose firm, ripe pears for the best texture and flavor.
- Adjust sugar based on the sweetness of your pears.
- Add a pinch of cardamom for a unique twist.
- Use a mix of pear varieties for a complex taste.
- For a smoother preserve, blend the mixture until desired consistency.
- Try adding dried cranberries or raisins for extra texture.
- Always sterilize jars to ensure long-lasting preserves.
- Cool slightly before transferring to jars for easier handling.
- Store in a cool, dark place to maintain flavor.
- Experiment with different spices like ginger or cloves.
FAQ – Ingredient Replacement Options, Money Savings, and Relevant Tips
Here are some frequently asked questions about making pear preserves. We’ve answered them in detail to help you create the best preserves possible, even if you need to make some adjustments!
Substitute Ingredients for Pear Preserves
Q: Can I use different types of pears?
A: Absolutely! You can use any type of pear for this recipe. However, note that sweetness levels can vary. Adjust the sugar accordingly. For example, if you use Bartlett pears, which are sweeter, you might want to reduce the sugar slightly. If you use Bosc or Anjou pears, which are firmer and less sweet, you might need to add a bit more sugar to balance the flavors.
Q: Can I make this recipe without pectin?
A: Yes, you can make pear preserves without pectin. The natural pectin in pears, combined with the lemon juice, will help the preserves thicken. However, it may take a bit longer to achieve the desired consistency. Just be patient and let it simmer until it reaches the right thickness.
Money-Saving Pear Preserves Tips
Q: How can I reduce costs when making pear preserves?
A: To save money, buy pears in bulk or when they are in season. Seasonal fruits are often cheaper and fresher. Additionally, consider visiting a local farmer’s market or a pick-your-own farm for the best deals. When you buy in bulk, you can make a large batch of preserves, which is more cost-effective.
Q: Can I make this recipe without canning?
A: Yes, you can! If you don’t want to can the preserves, simply store them in the refrigerator for up to two weeks or freeze them for up to six months. This option saves you the cost of canning supplies and the time involved in the canning process.
Easy Preserves with Pears and Apples
Q: Can I mix pears with other fruits, like apples, in this recipe?
A: Definitely! Combining pears and apples can create a delicious and unique preserve. Simply replace half of the pears with your favorite variety of apples. Adjust the sugar and spices to taste, keeping in mind that apples may be sweeter or more tart than pears.
Q: Do I need to adjust the cooking time when adding apples?
A: Yes, you might need to adjust the cooking time slightly. Apples may cook faster or slower than pears, depending on the variety. Keep an eye on the mixture and test the fruit for tenderness. Once both the pears and apples are tender and the mixture has thickened to your liking, your preserves are ready.
For more delicious pear preserves recipes, check out Taste of Home.