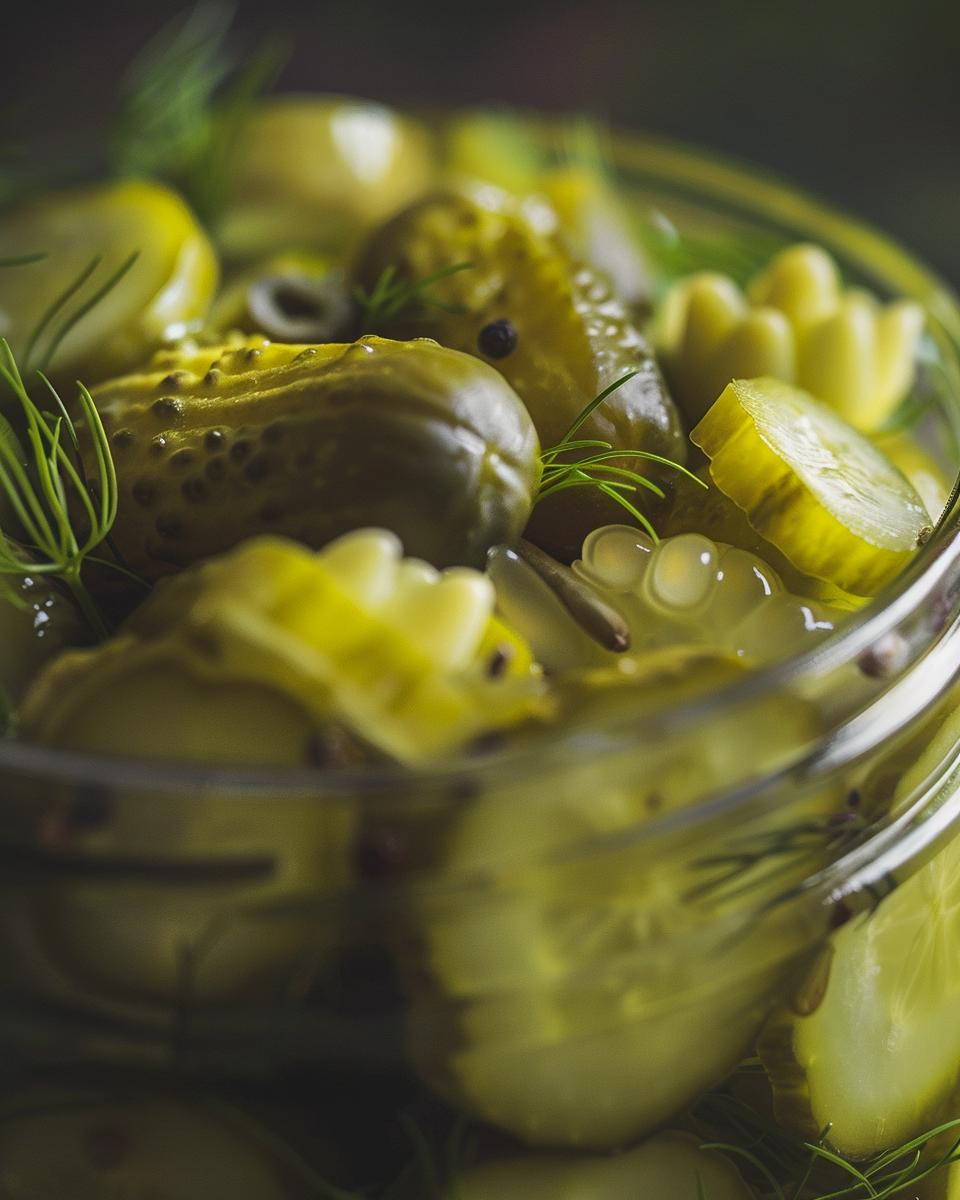
Refrigerator Dill Pickle Recipe That Will Blow Your Mind
Are you ready to elevate your pickle game? This refrigerator dill pickle recipe will blow your mind with its tangy, crunchy perfection. If you love pickles but want to avoid the hassle of traditional canning, you’re in the right place. This easy-to-follow recipe will have you enjoying fresh, homemade pickles in no time.
In this recipe:
- Simple ingredients for delicious pickles
- Step-by-step instructions
- Tips for perfect texture and flavor
- Variations to customize your pickles
Why settle for store-bought when you can make your own crisp, flavorful pickles at home? With just a few ingredients and some patience, you’ll have a batch of dill pickles that are sure to impress. If you’re curious about the secret ingredients for perfect pickles, check out our pickle brine recipe. For additional tips on achieving crisp perfection, don’t miss our refrigerator pickles recipe.
Ready to get started? Let’s dive into the recipe and discover how easy it is to create these mouthwatering dill pickles. Your taste buds will thank you!

Who Can Make This Recipe and What You Need
Anyone can make this easy homemade dill pickles recipe, regardless of prior pickling experience. Whether you’re a seasoned chef or a complete novice, this beginner’s guide to pickling is designed to be approachable and foolproof. The difficulty level is perfect for beginners, making it an excellent starting point for your pickling adventures.
Essential Equipment
To get started, you’ll need a few basic kitchen tools:
- A sharp knife and cutting board for slicing the cucumbers
- A large bowl for salting and draining the cucumbers
- A medium saucepan for preparing the pickle brine recipe
- A clean glass jar or container for storing your pickles
If you need a reliable glass jar, consider the Ball Quart Jar, which is perfect for this recipe.
Once you have your tools ready, the rest is simple. You’ll be making your own pickling spices, creating a DIY brine, and packing everything into your jar. The process is straightforward and requires minimal hands-on time.
With these easy steps and essential equipment, you’re well on your way to mastering the art of DIY pickling spices. So grab your ingredients, follow the steps, and enjoy the satisfying crunch of homemade dill pickles. Happy pickling!
The Ingredients Needed to Make Refrigerator Dill Pickles
Now that we’ve discussed the minimal equipment required for making easy homemade dill pickles, let’s delve into the heart of this best refrigerator pickle recipe—the ingredients. Choosing the right ingredients is crucial for achieving that perfect balance of tanginess, crunch, and flavor in your refrigerator dill pickle recipe. Ready to gather your ingredients? Let’s get started!
Essential Ingredients for the Perfect Pickle
1. Cucumbers: You’ll need 4 cups (1 liter) of thinly sliced cucumbers. Opt for fresh and firm cucumbers to ensure a satisfying crunch in every bite.
2. Vinegar: Use 1 cup (250 ml) of white vinegar. This ingredient forms the base of your pickle brine recipe and provides that essential tangy flavor.
3. Water: Add 1/2 cup (125 ml) of water to dilute the vinegar slightly, balancing the acidity for a more palatable pickle.
Gathering these ingredients is a breeze, and the simplicity of the list makes this one of the best refrigerator pickle recipes for both beginners and seasoned picklers alike. Have you got everything on hand? Great! Let’s move on to the next steps in creating your delicious easy homemade dill pickles.

Step-by-Step Guide on How to Make Refrigerator Dill Pickles
Now that you’ve gathered all the ingredients, let’s dive into the process of making quick and easy dill pickles. This step-by-step guide will ensure you get crunchy, flavorful pickles every time. Whether you’re making a small batch or using the cold brine technique, these instructions will help you achieve perfect results.
Step-by-Step Instructions
Step 1: In a large bowl, combine the sliced cucumbers and salt. Let this mixture sit for 2 hours to draw out excess water. This step is crucial for making crunchy pickles, as it reduces the water content in the cucumbers.
Step 2: After 2 hours, rinse the cucumbers thoroughly with fresh water to remove the excess salt. Drain well and set the cucumbers aside. Proper rinsing ensures that your pickles won’t be overly salty.
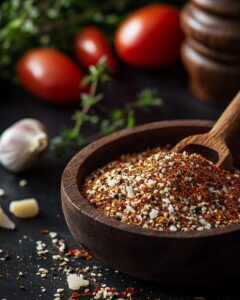
Step 3: In a medium saucepan, combine the vinegar, water, sugar, pickling spice (if using), and black peppercorns. Bring this mixture to a boil over medium-high heat, stirring occasionally. This forms the brine that will infuse your cucumbers with flavor.
Step 4: Once the brine has reached a boil, reduce the heat to medium-low and let it simmer for 10-15 minutes. This allows the flavors to meld together nicely.
Step 5: Pack the cucumber slices into a clean glass jar or container, leaving about 1 inch of headspace at the top. This space is necessary for the brine to fully cover the cucumbers.
Step 6: Pour the hot brine over the cucumbers, making sure they are completely covered. This is the cold brine technique that helps preserve the crunchiness of the pickles.
Step 7: Seal the jar or container and let it cool to room temperature. Once cooled, store the pickles in the refrigerator. They will be ready to eat in a few hours and will keep for several weeks.
By following these steps, you’ll master how to make crunchy pickles that are both delicious and easy to prepare. Enjoy your homemade refrigerator dill pickles!
Serving and Storing Ideas and Tips
Now that you’ve mastered the simple steps of making these delightful refrigerator dill pickles, let’s dive into the best ways to serve and store them. This recipe is accessible for all levels and requires minimal cooking knowledge, so anyone can enjoy these crunchy, tangy treats!
Serving Homemade Pickles
One of the great things about homemade pickles is their versatility. You can serve them as a side dish or snack, add them to sandwiches for extra crunch, or even use them as a garnish for cocktails. Try pairing your refrigerator dill spears with burgers, hot dogs, or salads. They also make a fantastic addition to a charcuterie board. How do you like to enjoy your pickles?
Remember, the key to serving homemade pickles is to keep them crisp and fresh. Always use a clean utensil to remove pickles from the jar to avoid introducing bacteria. When serving, you can place them directly on a plate or bowl, but make sure to keep them cool if they’ll be out for a while. Enjoy your pickles chilled for the best texture and flavor.
Storing Pickles in the Fridge
Proper storage is crucial for maintaining the quality of your pickles. Store your pickles in the fridge at a temperature of 40°F (4°C) or below. Always seal the jar or container tightly after each use to prevent air from getting in. This helps to keep pickles crisp and prolongs their shelf life.
It’s important to keep your pickles away from direct sunlight and heat sources, as these can affect their texture and flavor. Check your pickles regularly for any signs of spoilage, such as mold or off smells. If you notice any, it’s best to discard the pickles to ensure safety.
When it comes to how to keep pickles crisp, adding a few grape leaves or a pinch of calcium chloride to the pickling liquid can help. These ingredients help maintain the firmness of the cucumbers, resulting in crunchier pickles.
By following these serving and storing tips, you’ll be able to enjoy your homemade refrigerator dill pickles at their best. Whether you’re a pickle enthusiast or a newbie, these easy steps ensure that your pickles remain delicious and safe to eat. Happy pickling!

Pro Tips for the Best Refrigerator Dill Pickle Recipe
- Always use fresh cucumbers for the best crunch and flavor.
- For uniform slices, consider using a mandoline slicer.
- Use pickling weights to keep cucumbers submerged in the brine.
- Add garlic cloves for an extra burst of flavor.
- Mix white and apple cider vinegar for a sweeter taste.
- Experiment with different herbs like parsley or thyme.
- Store pickles in cooler sections of the refrigerator.
- Check regularly for spoilage and discard if necessary.
- Label jars with the preparation date for better tracking.
- Enjoy pickles within a few days for the best texture.
FAQ – Ingredient Replacement Options and Money-Saving Tips
Making refrigerator dill pickles at home is both fun and rewarding. Here are some common questions to help you along the way:
Ingredient Replacement Options
Q: Can I use a different type of cucumber, such as English or Persian?
A: Yes, you can use different types of cucumbers like English or Persian. However, be aware that the texture may vary. English cucumbers tend to be less crunchy due to their thinner skin, while Persian cucumbers can offer a slightly different flavor profile.
Q: Can I use dried dill weed instead of fresh dill?
A: Absolutely! If you don’t have fresh dill on hand, you can substitute it with dried dill weed. Use about half the amount of dried dill compared to fresh dill for a similar flavor.
Q: Can I use apple cider vinegar instead of white vinegar?
A: Yes, you can use apple cider vinegar as a substitute for white vinegar. This will give your pickles a slightly sweeter and tangier flavor. Feel free to experiment with different vinegars to find your favorite taste combination.
Money-Saving Tips for Pickles
Q: Are there any cost-saving tips for making pickles?
A: To save money, buy cucumbers when they are in season or purchase them in bulk. Fresh, in-season cucumbers are not only cheaper but also at their peak flavor. Additionally, consider making your own pickling spices at home to reduce costs further. Check out this DIY pickling spices guide for ideas.
Q: How can I ensure my pickles stay crunchy?
A: To keep your pickles crunchy, use fresh, firm cucumbers and avoid over-salting them. Another tip is to add a couple of grape leaves or a pinch of calcium chloride (often sold as “pickle crisp”) to the jar. These additions help maintain the crispness of your pickles.
Q: Can I make these pickles in advance?
A: Yes, you can make these pickles in advance. However, for the best flavor and texture, it’s recommended to consume them within a few days. They’ll still be delicious for several weeks when stored properly in the refrigerator.